Editor
Clean up long-form video by removing silences, filler words, breaths, and retakes — then review every cut before you export.
What the Editor does
The Editor turns a raw recording into a tight cut. It transcribes your video, finds the dead air and stumbles, and shows them to you as removable segments. Nothing is cut permanently until you press Export — the analysis stage only proposes; you stay in control of every segment.
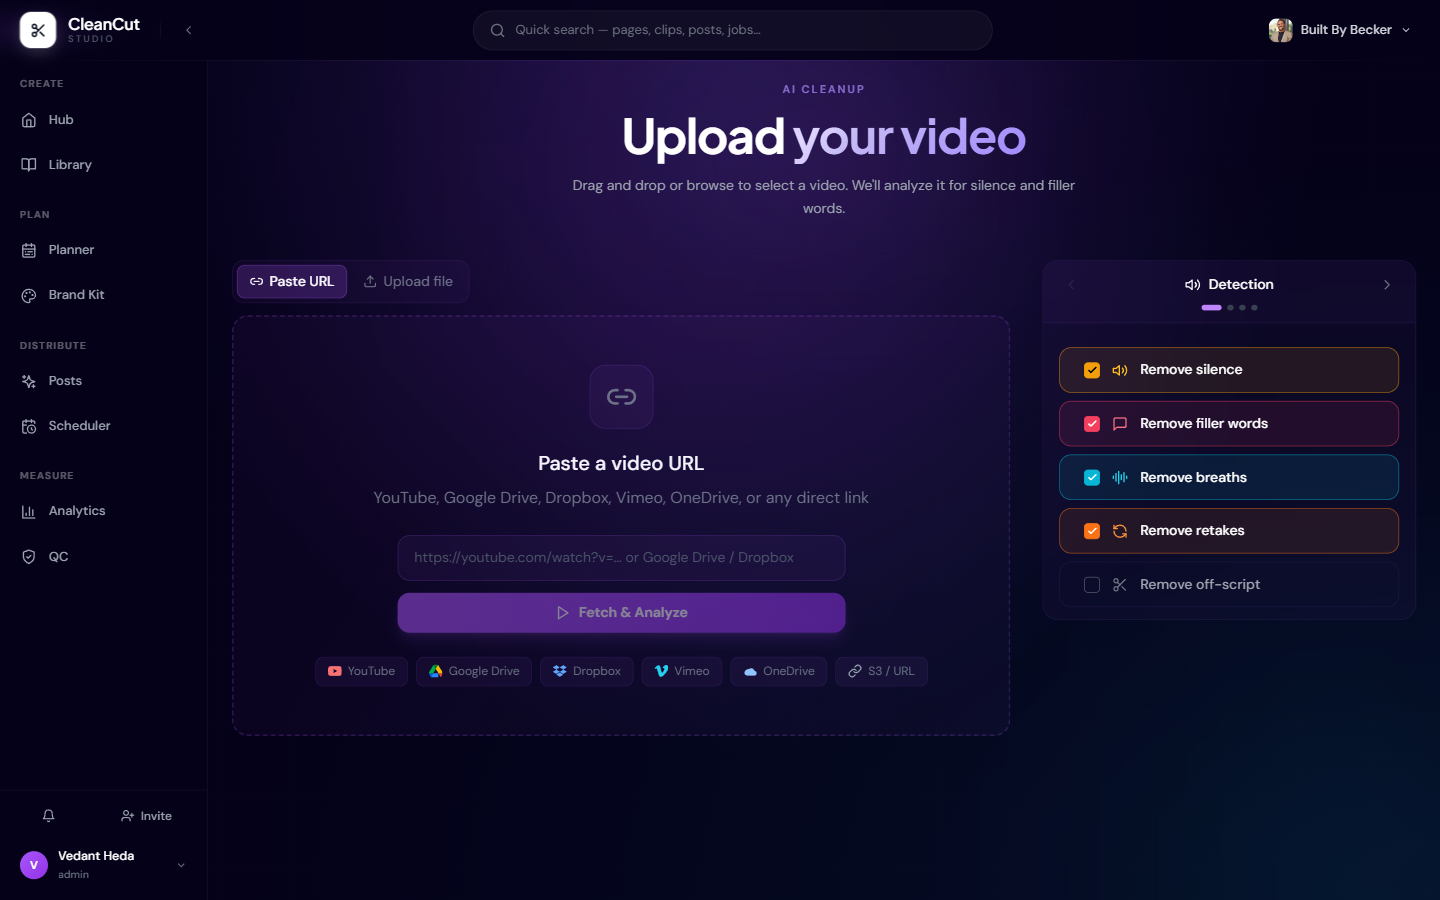
You can start a video three ways: drag-and-drop (or browse) a file, paste a URL (direct link, YouTube, or a Google Drive link), or arrive from the Media Hub with a video you already uploaded. Hub videos skip re-uploading and let you adjust settings before analysis begins.
Choosing what to remove
Before analysis, open the Detection tab in the settings panel and pick which categories to detect. You need at least one enabled to analyze the video.
- Remove silence — detects and cuts silent pauses. The threshold is tunable in the Advanced tab.
- Remove filler words — strips "um", "uh", "like", "basically", and similar. Add your own words in Advanced.
- Remove breaths — removes audible breathing between words, useful for close-mic recordings.
- Remove retakes — finds sentences someone re-said and keeps the best take.
- Remove off-script — cuts meta commentary, self-direction, and abandoned-take preambles. This one is aggressive and biases toward cutting.
Filler-word detection is most reliable when transcription runs through Deepgram, which transcribes filler tokens. On a local Whisper transcription path, filler detection is limited — lean on silence, breath, and retake removal there.
Tuning audio
The Audio tab cleans up how the cut sounds. These options run during export, so you can flip them on without re-analyzing.
- Normalize audio — brings the whole video to a consistent loudness. The target slider defaults to -16 LUFS (the YouTube standard) and ranges from broadcast (-23) to loud (-10).
- Boost quiet audio — adds extra gain when the speaker is barely audible.
- AI enhance audio — deep noise removal and speech enhancement. It adds processing time, and the preview swaps to the enhanced track once it is ready.
Reviewing and editing the cut
- 1After analysis lands, the timeline (and a transcript view) populate with every detected segment.
- 2Play through the preview — removed segments are skipped automatically so you hear the final flow.
- 3Toggle individual segments off if a cut is too aggressive, or add your own cuts directly in the transcript.
- 4Your toggles and edits autosave while you review, so a page refresh restores your in-progress work.
Resuming a previous session? Arriving from the Hub or your library reloads your earlier cuts so you can adjust them and re-export instead of starting over.
Captions and a hook
In the Captions tab you can burn captions into the export. Pick a caption style from the preset grid (your Brand Kit styles show up alongside the built-ins), then optionally open the customiser to fine-tune it.
You can also add a Hook Overlay — scroll-stopping text baked onto the first few seconds. Let the AI write one from your transcript (and nudge it toward a question, claim, curiosity, or urgency angle), or type your own. The hook duration is adjustable, all the way up to the full clip length.
Exporting
- 1When the cut looks right, press Export.
- 2CleanCut renders the final video with your enabled segments removed and your audio and caption settings applied.
- 3Watch the progress and estimated time remaining as it processes.
- 4Download the finished MP4 when it completes.
You can also process several videos at once with batch upload. Batch jobs apply your current settings to every file automatically — individual segments are not reviewed, so confirm your settings first.